Central Florida Health and Wellness Magazine Health and Wellness Articles of the Villages
Related Articles


 As the holidays and school breaks approach, it can be a great time to create some in-home activities with your family! Sensory activities employ the senses of sight, smell, touch, sound, and taste to create interesting, fun sensations that allow children to interact with their environment in ways they typically would not be able to otherwise. This blog post is all about providing some ideas and sparking some interest around creative activities you can put together with everyday materials.
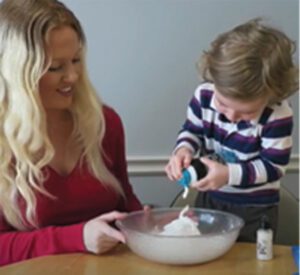
Make Your Own “Snow!”
Living in Florida gives us warm weather year-round, which sounds great for anyone that has ever had to scrape ice off of their car’s windshield in the morning before driving to work or shovel snow off of their driveways and sidewalks. This activity will give you all of the sensory goodness from touching and playing with the cold snow indoors (or outdoors) without all of those daily snow-related chores!
Here is what you will need:
• A large bowl
• Spoon/stick for mixing
• ½ Can of shaving cream (refrigerated for a short time to give the “cold” effect)
• 1 Box Baking soda
• Clear glitter (optional)
• Newspaper or plastic wrap to cover any surfaces for easier clean-up
The directions for this activity could not be simpler – just mix the ingredients together and enjoy! The more you mix and the longer the ingredients sit out lead to a more crumbly-textured “snow!” If the mixture feels too wet or too dry you can add more baking soda or shaving cream to reach your desired texture and consistency. Keeping the shaving cream in the fridge prior to mixing is also optional, but the cold cream should help the “snow” feel like the real deal. The glitter is also optional – it can tend to be a bit difficult to clean up if not carefully contained within the activity.
Edible Wearables
This activity is all about hole-y snack foods! Who can resist edible wearables? While assembling these wearables, you will have an opportunity to practice labeling some sensory feelings related to taste such as sweet, salty, and maybe bitter or savory depending on the snacks you want to string and eat! Here’s what you will need to complete this activity:
• String (edible or other food-safe material)
• Your favorite snacks (with holes!)
• Safety needle (optional)
There are some versions of this sensory activity that use an edible alternative for the string, like red licorice and “Fruit by the Foot”-type rolls, but some of the alternatives may be hard to tie-off and successfully wear. First, cut a piece of string about twice as long as you want the wearable jewelry to be and begin to knot one of the ends to be larger than the largest hole on the snacks you plan to use. Next, get to stringing! You can use a safety needle on one end of the thread to help make it easier to place the string through the items, but it is not necessary to successfully create your masterpiece. Foods that have holes will be the easiest to work with such as chocolate-dipped pretzels, Veggie Straws, Cheerios, and Life-Saver gummies. If you are using the safety needle, you may be able to use it to string other items such as gummy bears that otherwise do not have neatly made, ready-to-string holes. While stringing, be sure to leave some room to tie the ends together! After you are finished adding the snacks to the string, join the ends together at the desired length and tie them together to complete the wearable item! The final step is to wear and enjoy your creation.
Sensory Squish Bags
This activity is great for visual and tactile sensory feelings! Sometimes, squishing gels and slimes can make a big mess. The great part about this activity is that it is entirely contained in a plastic bag. The items will be suspended in a gel so the design should hold its shape, and the bag can be squished and squashed without any of the mess! Here is what you will need for this activity:
• A plastic sandwich or gallon bag that can be zipped close
• Clear hair gel
• Food coloring (optional)
• A permanent marker (optional; to make designs on the bag)
• Items to fill the bag with
• Duct tape or masking tape to seal the bag
First, draw any designs you would like to add on one side of the bag. Next, pour a generous amount of clear hair gel into the plastic bag. Then, add food coloring if desired. A little food coloring can go a long way here – the gel will become more opaque as you add more and more food coloring, so only add a little if you would like to see through it (for that “stained glass” appearance). After the gel is ready, add in the small items! Depending on the theme of your bag you can add beads (or “ornaments” to decorate a tree design), googly eyes, small plastic animals, foam shapes, and more! The sky really is the limit with what you can add to your bag. Adding a variety of items can provide an excellent opportunity to practice your child’s tacting (labeling) and intraverbal skills. For each item you add, you can ask many questions about the color, size, where you can find those items, and so much more. Finally, use tape to seal the bag so that it will not open with all of the squeezing and squishing. Now the squish bag is ready to play with! Push the items and gel around to fill the shapes you drew on the bag and hold it up to the light or place it on a window to see everything from a new perspective!
For other great, sensory friendly ideas, or to find out more about Tampa’s leading provider of pediatric Autism therapy, visit: bcotb.com
Bcotb.com | (813) 814-2000 | info@bcotb.com
Serving Brandon, Carrollwood, Oldsmar, Wesley Chapel, and Westchase!